HEADER

HEADER

Friday, October 10, 2014

Silhouette Cameo Project: Using the Trace feature


Many of you are coming from my Halloween Witch Silhouette project. I wanted to show how easy it is to use the Trace feature. Mastering this will allow you to make many of your own shapes, which can save you money! However, most images from the Silhouette Online Store are less than a dollar and they do indeed have witch silhouettes!

This tutorial is tailored to my Witch Silhouette project, however everything you need to know about tracing the outline of any saved picture is here.

1. Set page size to Letter

 2. Drag in your image. When you are tracing and the warning icon shows up you can ignore it most of the time. It is just informing you of low resolution, which might be a problem if we were printing.

 3. Go to the Trace tab and select "select trace area.

 4. Drag trace area over your image. When you let go of your mouse a yellow outline will appear.

5. Unclick High Pass Filter. Move your Threshold and Scale dials until the entire image is yellow and has a nice clean outline. 

6. Click Trace!

7. Click on your image and move it to the side or delete it.

8. Go to the Replicate tab and click Mirror Left. Only do this if you want your witch facing left.

9. Using the Ellipse tool make a 9"x6" oval.

10. On the Align tab you can center to page your oval. Size your witch to desired size. You can also align her center with the oval to see if she fits correctly. 
11. Cut your images on separate pages. BE SURE TO CUT THE IMAGES INDIVIDUALLY. You don't necessarily want a witch shape whole in your oval.  

11. If it is helpful you can use the fill page to color your shapes to get a better feel for what your project will look like!


Good luck!


Witch Silhouettes

I have wanted to make a project with face silhouettes for quite some time now. As I contemplated on how I was going to decorate for Halloween, I though of a simple way to showcase a witch's silhouette. This project became the center of my Halloween decorating. I am obsessed with how they turned out!


Where I bought my supplies: 
Spider Web Backing Paper: Hobby Lobby
8.5" x 11" Black Frames: Dollar Store 
Witch Silhouette and backing oval: black and white card stock from Hobby Lobby

This project really was done in a flash!

1. Simply Google "witch silhouette" and choose your favorite. There are two ways to go from here. 

2a. Option 1: For those of you WITH a Silhouette machine start your project by making your page a standard Letter size. drag your image and use the trace tool. For those of you who would like I have a step by step picture tutorial here
2b. Option 2: For those of you WITHOUT a Silhouette you can find your image, size it on Word processor and print. Cut out and trace the face on the card stock, then cut it out by hand. 

3. After you have your witch use white card stock and cut out an oval. My oval was sized to leave an inch space of backing on each side.

4. Simple glue your project together and you have a witchy fantastic decoration to help add a bit of magic to your home!


You can read more about my Halloween Mantel here!

Buggy Halloween Wreath

Story: Last year I made a very similar wreath. I used a twig wreath, snakes and painted it black. Let me tell you- that thing was scary! It actually was a bit satanic looking. My husband took one look at it and asked me to please not hang it up. Truth be told I agreed. It was a bit too spooky! This is my second try. I grabbed florals, spiders, cockroaches, and large millipedes. My idea was to create a decor idem that would belong to Mrs. Frankenstein or the Adams' Family. This looks spot on. I love it!  
This Halloween wreath is a testament to how awesome spray pant can be! All the flowers and bugs are cheap cheap cheap. I found my bugs at the Dollar Store bugs and clearance christmas flowers at Michael's/Hobby Lobby. Because it's the Halloween and Fall season Michael's and Hobby Lobby mark their christmas decorations 40% off. Most flowers and leaves were 50 cents. Many of the leaves are cut into pieces. You can easily fill a large twig wreath for under 10$


Assembling the wreath can seem a bit disorienting. Sparkles and color seem to have vomited on your twig wreath. I used a glue gun to secure the pieces. 

 To give you wreath nice dimension be sure to layer your bugs, flowers and leaves. Weave the leaves and bugs among the twigs. 

I used Krylon Flat Black Spray paint. The cheapest price I have found for this is at Walmart. Its a good few dollars more at a craft store. Spray painting this takes a bit of care because there are so many layers and angles. Take your time and keep a good 12" distance as you spray- you don't want any drips!


I used some extra spiderweb and wrapped it around the wreath- focusing on the back. This really took it up a notch. Be sure to stretch that webbing THIN to get this desired look.


Book Themed Birthday Party!


Kelly loves to read books, so much so that we read hours a week. I knew her first birthday party should reflect her sweet little passion.

My color and pattern choice was "Charming Country." I used mainly red, white, blue and yellow. When going for this look adding yellow significantly changes the color scheme from "4th of July" to "Charming Country."

I used some antique books as decoration as well as Ikea milk jugs.


 The party favor was a little bookmark I made from library cards. I was able to buy a blank 50 piece stack from Amazon. I used a date stamp (from amazon) to put the date of her 1st birthday. I also added a quote by Charles Eliot, ribbon and old fashioned postage stamp, from Michael's. 
  

I loved this quote so so much that I framed it. After the party I hung it in Kelly's room, not only to give to her as a lasting keepsake from the party, but so she can grow to believe these words herself.


Books were an inspiration of the food served. 


I made deviled eggs based off Green Eggs and Ham. I decided to add green food coloring to just a few of the eggs because I know many people find food coloring unpleasant. Not pictured was a Ham, cheese and crackers plate to get the HAM from the book.


Picture garland with micro clothes pins and wallet size photos clipped to bakers string. The circle garland was made from old book pages (cant see the words well in this picture) that I punched holes in and chain sewed together. The final rosette garland was made from coordinated scrapbook paper.


There was a daring bunting banner that didn't get photographed.. Along with another circle punched paper garland :/ However we did snap some pictures of Kelly with her parents and grandparents. Notice: Sam, Kelly and I purposely dressed to match the party color scheme. My dad.... haha! I guess he did to!


Thursday, January 16, 2014

DIY Flower Crowns/Halos

I was really pleased how these crowns turned out- I wanted to wear mine all day. I felt like a garden flower child. 

Pretty simple to make, just time consuming. 

A few things to know when making your own:
Buy more flowers than you think you will need. You use a ton to cover the base and wires. You want these to be full! I bought 7 different plants and then got multiples of some. Use a few different kinds of flowers of the same color. This makes the crown visually appealing.  I used three or four white/cream flowers and then had yellow and red accents. Secondly, this project can be outrageously expensive you don't buy the flowers while on sale. Wait until your local craft store is having a sale. Hobby Lobby frequently has their faux flowers 40% off. Lastly, don't be too quick to strip the flowers of the greenery that comes with them. Keep some leaves  and branches to make the crown look more natural. 


You will need: 
Wire cutters 
Green floral wire 
Green floral tape
Hot glue 
Faux flowers 

1.Take a simple vine and measure around your head. Overlap by an inch on both sides and cut. Wrap wire around the over lap to secure ends. Wrap wire in tape. Let some branches hang loose, but attach most of them to the main base. 

2. Using wire cutters cut flowers.  Be sure not to cut too close to the base of the flower or you will lose petals. On many I left part of the stem on. This allows for different overlap and attachment options (see below).

3. To attach flowers to the base vine you have two options. You can hot glue the flowers or you can 
wrap the stem of the flowers to the base vine using the wire and tape. 

4. Be sure to completely cover your vine. The key to making these look nice is that they are full. I would have two are three flowers attached in the same spot (which is why it is nice to have flowers with an inch or so of stem.) 

Mason Jar Pin Cushion

I am in love with this!! It takes about five minutes to make and you can use the lid with or without the jar. I store sewing notions in the jar.


You Need:
Fabric
Stuffing
Mason Jar Lid
Felt
HotGlue Gun
Scissors
Pen


1. Cut your fabric, I cut it a 4x4 inch square.

2. Trace the inner lid. Cut. Set aside. You will come back to this piece:


3. Make a sandwich with the ring on the lid on the table, the fabric (wrong side up) the stuffing, and then the lid, wrong side up. Press the lid so it is closed tight. You may need to adjust the fabric and stuffing so it has a nice round shape:


4. Pull the edges of the fabric tight and hot glue down:


5. Hot glue the felt to the underside of the lid, over the fabric edges:


6. Flip over and stick with pins.


Use alone or with a jar! Enjoy and happy sewing!

Easy Apple Pancakes

Tonight for dinner I made breakfast.  These apple pancakes were incredibly simple to make and very delicious. The best part is you probably already have all the ingredients!
I was "pinspired" by a recipe (from Carla Hall) that I found on pinterest. I simplified it and made some changes.

Apple Pancakes:
Pancake batter
1 egg
1 teaspoon Lemon juice
1/2 teaspoon Cinnamon
Dash of Nutmeg
Powdered sugar
2 Apples

*Serves 2-3

1. Follow packaging directions, make pancake batter. ( I used 3/4 cup of my powder mix.) If your pancake mix does not call for egg, still beat in one egg. Add cinnamon, nutmeg and lemon juice.
2. Skin and core 2 apples. Slice them into 1/4 inch thick rings. I used green apples.
3. Using fork, emerge apple slices into the batter. On a greased gristle fry the slices.
4. Dust with powdered sugar and serve with syrup.


Six Month Old Photography Tips

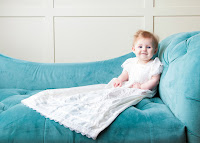
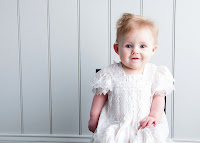
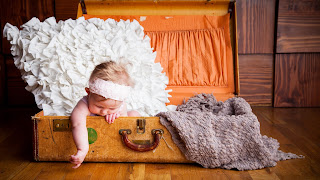
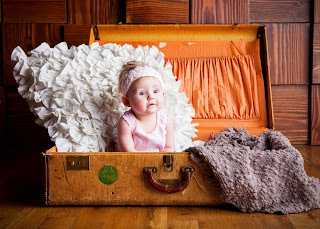
On Kelly's six month birthday, My mom and I went and get pictures taken at FotoFly Studio in Draper, UT. They are incredibly affordable, quick and efficient. You get prints within seconds and go home with your digital copies. It was interesting to come up with poses for Kelly because she cannot sit up entirely by herself yet. I was worried there would be little diversity in her pictures. That was not the case at all. 

Here are a few tips I picked up:

1. Even if you don't anticipate baby needing to eat, have a snack or bottle ready. The flashes and stimulation can be quite overwhelming and 20-30 min in baby might need a little snack and rest. With limited time with the photographer have that bottle, mixed on hand. I usually do not let my girl eat whenever since she is on a feeding schedule, but happy baby = pictures of happy baby. 


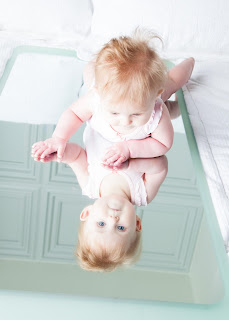
2. If you are going to attempt mirror pictures, lay baby on a very large mirror. The mirror we used was larger than your typical full-body mirror, yet, it was not large enough and the pictures were not solely baby and mirror like I had imagined.


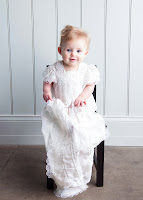
3. If you want to have the illusion that your baby can sit upright in a chair, have one person, mom, sit very close, playing safety. I was able to grab Kelly when she lost her balance. The photographer will work with angles to avoid you.


4. Using textured pillows to prop baby was a hit because it entertained baby and photographed nicely. 


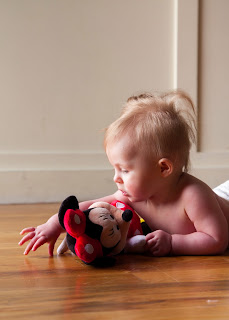
5. For infant photography props are key. We brought some toys for her, which was special to capture her with some of her favorite toys. The studio had tons of seating, pillows and baskets. I could not have been more pleased.


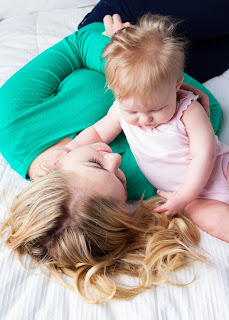
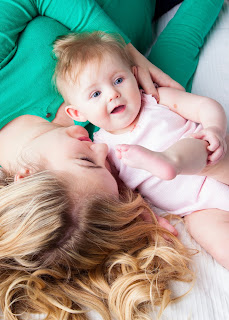
6. I wanted to be in some pictures with Kelly, but I have not lost all my pregnancy weight. The poses we used below, completely avoided my issue areas, yet showcased some special play time with baby. These pictures are very special to me and I love how they turned out. 


Lastly, remember to bring pose ideas with you. I had pictures saved on my phone that I showed our photographer so she knew what I was looking for. I also flipped through them a couple times during the shoot to ensure we took all the pictures I had planned on.